Working with Nicholas Young (Final Major)

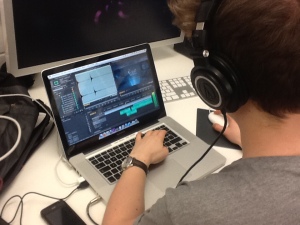
Yesterday DMP’s resident Ewok Nicholas Young (AKA Yung Whippy) came into the cave room with me so that I could work on a soundtrack for his stop motion piece.

This is Nick Young. He is small. Mischievous and not really that young.

This is Nick Young. He is small. Mischievous and not really that young.

Nick had asked me right at the start of this unit if I could provide a soundtrack to his work. I accepted but the mixture of working on my own sounds for uni, working a job in the evenings and being a full time legend meant that I struggled to present him with any sounds. I decided it would be better and invited him to spend a day in the cave room with me which I would be purely dedicated on his soundtrack. I got in at around 10:00AM and got everything set up. About an hour later Nick turned up. From seeing his project’s set and models develop I knew that the story and visual aspects of his animation would be very dark. Below are some super high quality photos of his current set.

This is where Nick spends most of his days. He can't get much Vitamin D

This is where Nick spends most of his days. He can’t get much Vitamin D

A small scene that nick has made out of mod-rock and real rock.

A small scene that nick has made out of mod-rock and real rock.

Inside Nick's little den.

Inside Nick’s little den you can see his main set.

A close up of his character that he's made.

A close up of his character that he’s made.

So having seen the development of these sets and his characters and knowing about the story behind his work I was confident that I could write a track to complement it. Nick told me that he wanted the sound of Vinyl records crackling throughout the whole piece. This was easy to achieve as My software has loads of ambient crackling samples in it already. I found one that was nice and subtle and then clipped a small section off of the end so it would loop seamlessly over 16bars. After this I loaded up a sub bass sound and ran a LFO (low frequency oscillator) through the noise so that it wasn’t just a continuous hum of bass. Then I added a Low Pass Filter to the sound and automated the intensity of the filter so It would give the impression that the Bass was rising and falling away into the Background.

This is what the different groups and scenes look like for the soundtrack to Nick's animation. Within each group are a number of sounds and FX buses.

This is what the different groups and scenes look like for the soundtrack to Nick’s animation.
Within each group are a number of sounds and FX buses.

The sound currently was to intense and would have been uncomfortable to listen to for most people so I reduced the low and mid-low E.Q. values a little. This is something I’ve been doing more regularly as I think I had gone from not having a enough bass in my tracks too pushing way too many low frequency sounds into a track. I’d noticed that This was making my tracks sounds really muddy through my headphones. After this I began to add some sounds which I connect with darkness and too an extent the idea of insanity. Something that I had picked up from the story behind Nick’s character. One of these sounds starts off as simple clap drum. usually from an 808 or 909 kit. Then I set the beat-grid in my software to 1/32 of a bar. (This means you can fit more sounds in a smaller amount of time. I then paint the sound into each new space within this bar. When the claps are played back with this new time signature. It sounds horrific and would be very painful to listen to at a high volume. However when you apply a Low Pass Filter to it and sweep it up and down subtly it can sound something similar to a helicopter’s blades passing overhead. Then I panned these filtered claps from left to right to bring a sense of space to this effect. I continued doing this with other sounds, the majority of them were other percussion instruments. The applied filter has to remain fairly strong throughout when this technique is used to make sure the high frequencies of the claps aren’t too piercing on the ears. The I ran some of these sounds through a Flanger. (Flangers can give a warping/robotic effect to some sounds).

You can see how I've fitted more sounds in the same space by setting the beatgrid to 1/32

You can see how I’ve fitted more sounds in the same space by setting the beatgrid to 1/32

Nick stated he wanted an almost robotic/ industrial feel to run subtly throughout so I thought this would add to that idea. After this I stated working on some subtle noises like drips and small metallic noises that echoed and reverberated around the audio space. I found some that i like and created small, unobtrusive melodies to add some higher frequency detail to the track. I uses a mixture of panning, BPM delays and reverbs to add a feeling of space and time to the project. Like I’ve been doing in my previous project I limited the amount of sounds that played through one area of the speakers at the same time. If I did layer two or more sounds to play together I’d make sure to offset them to the left or right sides of the speakers. Giving each noise more space in the mix. After this it was time to develop the track further so that it would complement the narrative of Nick’s animation.

He explained how he was going to create a montage within his work in which his character loses his mind and goes crazy. He wanted me to create this mood through within the track.

Here is What it looks like.

Here is What it looks like.

To do this I inserted some Kick Drums. I didn’t want ones that had a dancy feeling to them so I found some samples of an old kit in the Mashcine software that I liked. I took these into the piano roll and then Pitched them 4 octaves lower than they are originally set. This made them sound incredibly muddy so I filtered out some of the lower band frequencies to clean the sound up. Then I created a small drum pattern that used different pitches. The resulting beat I had was almost tribal in nature and very dark. I liked it a lot and Nick thought it worked really well when I played it alongside the ambient sections of the track. I wanted to push the sense of menace and rage further and so did Nick. I found a synth sound that I would usually associate with house music or trance, and experimented for a while with it. I applied some distortion, reverb and filters over the sound, which totally transformed it into an industrial drone. Then I pitched it down a few octaves lower and took some of the release and sustain values out of the noise so it would end more abruptly.
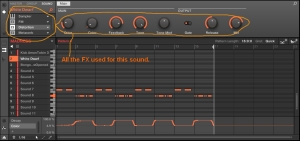
So as well as the distortial effect I also used a Frequency Modulator. Something I've used befor which can give a metallic buzz or screech to a sound.

So as well as the distortial effect I also used a Frequency Modulator. Something I’ve used befor which can give a metallic buzz or screech to a sound.

It sounded really good and after adding some Feedback within the Distortion effect. I was happy with the sound and inserted it in to the timeline. The resulting composition was really effective and Nick loved it. I looped this sequence for 16 Bars. After this I calmed the track down a bit and revisited the ambient sections. I made some subtle percussion additions but apart from them the track remained the same as the intro. Nick then asked me to finish the track off with a climactic\ crazy mess of noises that would compliment his ‘death’ scene. To do this I copied and pasted the industrial pieces of the track and added and Grain Stretch effect. I don’t actually know the technicalities of what this effect actually does. All I know is that when applied and manipulated it turns all the sounds into a time stretched bowl of audio spaghetti that tangles up and warps in a crazy mess. Nick Seemed to like it though. So I faded it out to silence to mark the end of the main sound track.

You can also see that I lengthened the silence at the end of the beatgrid to allow time for the Grain Stretch effect to  fade and filter out.

You can also see that I lengthened the silence at the end of the beatgrid to allow time for the Grain Stretch effect to fade and filter out.

Here is the final track.

Nick then asked me to produces some small sound effects for him. One of these was the ambient sound to the laboratory he constructed. To do this I took a completely new approach to production. I turned the beat grid off so that nothing could be quantized. Essentially this can remove all structure or notion of beat to the track. I also lowered the tempo to 33BPM which is much slower than the a lot of music. Then I found some synth sounds and took all the release and most of the sustain values out of them so they were small glitchy beeps and blips of noise. Then I tapped as many keys and pads as possible with complete disregard for any type of musical scale. I was really surprised at how effective the result was. It sounded like a living community of computers talking to each other. The sound however was a little sharp so I added a small amount of reverb to the master channel and this gave everything a sense of space.

The different sounds I used to create 'Lab ambience' in my timeline. "All the colours of the bow"

The different sounds I used to create ‘Lab ambience’ in my timeline.
“All the colours of the bow”

You can see here all the notes I've played for one of the many sounds in the piece. It was totally random. with no deliberate melody played as I wanted the track to sound as spontanious as possible.

You can see here all the notes I’ve played for one of the many sounds in the piece. It was totally random. with no deliberate melody played as I wanted the track to sound as spontanious as possible.

Here is the Final Lab Ambience Track. It is only 8 Bars long and Nick will be easily able to loop it if he wants it longer.

Development – (Final Major Project)

So for the past year I’ve been focussing mainly on the production of music. I feel like this current unit has tested me a lot. I feel more confident in my music, I’ve learnt a load of different skills and techniques in the past few months that have made my music sound more polished and professional.

This unit has also turned me into more of a perfectionist. The first tracks I ever produced were on the Ipad, and although I could not have expected the same quality in sound that I can achieve now, I do feel that I was too eager to put my sounds up online. I think I’ve become a lot more critical of my work. Roughly 90% of the tracks I start will not make it out of the draft stage. This could be seen as a positive or a negative thing. Occaisionally I feel like I disregard a draft to early and begin a new project. However I’ve accepted that for now it’s the way I work. I have to create something that grabs my attention instantly and then work around it, spending time to develop it into a track.

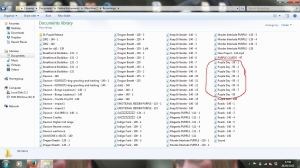
I’m trying to be a lot stricter with what I export as a finalised track. I’m finding that my project files now have multiple versions, where I have tweaked and re-tweaked different elements. These small changes are often so that the mixdown of the track sounds a bit tighter.

Highlighted, Is a track that is currently under a different name and will feature on my online release. It has 7 different varients (As well as others under differernt names)

Highlighted, Is a track that is currently under a different name and will feature on my online release. It has 7 different varients (As well as others under differernt names)

I’ve also started to listen through to exports of my tracks through differernt speakers. This has made me realise just how important it is to spend time on mixing your track. It’s still an ongoing battle for me but I feel like my tracks are balanced better than they would have been a couple of months ago. At the moment I use Phils Pre Sonus monitors to produce on, but then I’ll listen through to the track through laptop speakers, my headphones and then through my speakers when I get home. A lot of low frequency detail is lost when music is played through a laptop’s speakers so I’ve started to boost the mids and the highs a little bit in my Bass sounds so that they can be heard through a laptop.

As well as this I’ve occasionally applied a bus compressor to the Master Channel. To tighten all the elements, although I’ve used it very sparingly as it’s so easy to overcompress some elements of the track.

“We’ve lost Gorgeous George” – Working with George Drake” (Final Major Project)

As part of my final unit I wanted to try and work to different client briefs so that I would challenge myself to make styles of music for a specific purpose like a current piece of work. It would also challenge me to produce styles of music that were new to me and took me out of my comfort zone.

My friend and Photographer George asked me to produce a track for him for a stop motion piece he was making for his course.

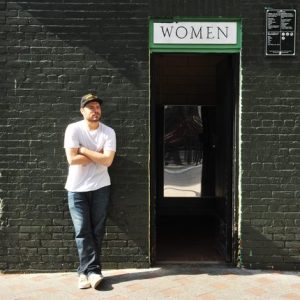
This is me with george. He wears funny shirts.

This is me with George. He wears funny shirts.

He told me that his shoot was heavily inspired by Alice and Wonderland. When I heard this I thought about how trippy the Story to Alice and Wonderland is and how I could mirror this feeling through my music. I started thinking about the idea of time and how a differing perception of time often complements the idea of psychedelics and the thought of something being trippy. Keeping this in mind I started writing a piece of music with the idea of time at the forefront. I found some sounds that I associate with the idea of time. These were some bells and the tick of a grandfather clock. I started to manipulate these in different ways like adding a ‘reverb’ effect (Reverb can bring a sense of space to a sound) and a delay effect (Delays repeat a sound after it is initially triggered and the time signature of this delay can be manipulated in a variety of different ways).

I added the sounds to the piano roll (essentially a timeline that enables you to insert sounds with varying keys and pitches to create a melody).

I wrote a melody that George liked and looped it. Then I started to create some sounds to to add to this melody. George asked for some strings. I started off with a harp which I added delay and reverb to. This sounded a little to bright and stood out from the rest of the track a little too much. George asked me to lower the sound. So I did that and to me it sounded fine. He then asked for me to change the key a little. I played him one that he liked. His choice was strange for me to hear at first as I personally thought it was out of tune. However after listening to it a couple of times I grew to like it. It also started to make sense as It fitted in with the strange and trippy context of his work. I hadn’t really considered playing things deliberately out of key before.

I’ve added some screen shots from the project below.

Screen Grab 1

Screen Grab 2

Screen Grab 3

Screen Grab 4

Project Purple, Aviation. (Final Major Project)

Below is a short clip of a track I have made called ‘Aviation’. It will be the first track on my upcoming release which is currently called ‘Project Purple’ (working title)

The finnished release will be on Bandcamp and will be a journey through my musical interperation of the colour purple. The release will cover a variety of different styles and will show my experimentation with tempo’s and beat structures that I feel I have neglected in my previous works.

Below are some screen grabs of what the track looks like.

Keys, used on the piano you can hear on my track 'Aviation' The blue see-through notes have less volume that the solid colour blocks.

Keys, used on the piano you can hear on my track ‘Aviation’ The blue see-through notes have less volume that the solid colour blocks.

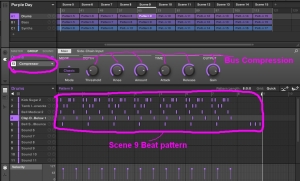
I've used bus compression on my Drum tracks. This gave my drums a bit more punch. You can also see the beat structure I used in one of the sections of my track.

I’ve used bus compression on my Drum tracks. This gave my drums a bit more punch.
You can also see the beat structure I used in one of the sections of my track.

A screen grab of the bass notes in scene 9 of the track.

A screen grab of the bass notes in scene 9 of the track.

… Gin & Jazz …  

Cakes Have Layers… Ogres are not like cakes… Claps are though. (Final Major Project)

As Shrek once said "Ogres are not like cakes"

As Shrek once said “Ogres are not like cakes”

Shrek might be right, but what I’ve been realising is that certain aspects of music production are very much like a good victoria sponge. One aspect of music that I like to be punchy is the clap drums I use, this stems from my love of dubstep, where the claps seem to have as much impact as the kicks. For a while I struggled to achieve this effect. I tried putting filters over them, which made them sound muddy, which I really didn’t want. Then I tried adjusting the E.Q.’s, this helped a little, I would boost the lower-mid frequencies to give the claps a larger presence, however i still wasn’t satisfied. After this I read some dubstep production forums. I saw a few people mention how they layer their claps with a kick drum that is panned to the opposite side of the speaker to the clap. I gave this a try. At first the kick overpowered the clap, so then I reduced the gain on the kick and removed most of the high E.Q. band as well. This was really effective, it added a lot of presence to the clap, giving it real impact and presence in the mix.

With the recent tracks I’ve been producing for my ‘purple’ project I have not been using this technique as i want a more subtle sound. However I will use this method when I next produce something a little more hard hitting.

The 3 doors. AKA, panning. (Final Major Project.)

Part of the mixdown progress which I feel has added to the quality of my exported tracks is panning. This can be used for creative effect or to give instruments their own space in the mix. After researching into this online I feel like I’ve got a good understanding of how it works. An easy way to understand it for me is talking about 3 doors which represent the left, middle, and right side of a speaker, and three people who each represent an instrument (I find panning percussion instruments to be of highest importance.)

If all three people try and get through the door at the same time they will struggle, get tangled up with each other and not reach the other side any time soon. However if they use each of the doors then they will be able to because they have enough space.

Here’s a diagram which displays how panning instruments gives and instrument it’s own space in the mix and also gives the impression of a 3-Dimensional sound.

Although this diagram is about orchestral music the principal is still the same for any music.

Although this diagram is about orchestral music the principal is still the same for any music.

With my own productions I usually keep the kick drum in the center of the mix and offset the claps or snare to the right or left but only very slightly. I do this so that if I apply a long reverb to a clap it has time to play out on one side of a speaker before the next central kick drum is triggered in playback. Applying this technique to my tracks has made them sound much more polished and professional. I’m able to hear more detail in them.

You can see below how I have panned my drums for the track ‘Aviation’.

I have left both the kick and the clap central in the drum group.  The clap has bery little reverb on it so does not disturb the sound of the kick.

I have left both the kick and the clap central in the drum group.
The clap has bery little reverb on it so does not disturb the sound of the kick.

With the other instruments I tended not to pan these. I thought they all sounded well mixed and had their own space. However I lowered the velocity of a lot of them to give them a less electronic feel and more subtle sound.

With the other instruments I tended not to pan these. I thought they all sounded well mixed and had their own space.
However I lowered the velocity of a lot of them to give them a less electronic feel and more subtle sound.

Jazz Grooves, Emotional Riddim’s and Outer Space Sounds. (Final Major Project)

With my current music portfolio covering a variety of different styles, I feel like it’s time to express my self through my sound and leave university with a solid piece of work. I want to achieve this through a digital release of some I’ve been working on as well as some that I’m yet to produce. I’m not calling it an album, or an E.P. it’s just a release. It will be a release to be played in chronological order that contains a mixture of traditional sounding, Jazz influenced bar grooves, emotional riddimms and my own take on a future jazz sound.

My inspiration comes from the sounds of Joker, Bonobo, Silkie & Blockhead.

Joker.

Joker is a producer from Bristol.

Joker

Joker

Joker produces a futuristic style of dubstep and grime music which is often very heavily synth based. He is well known for being a pioneer of the ‘Purple‘ sound, which has a empahsis on bass, 80’s music jazz and hip hop.

Bonobo.

I find Bonobo’s is the perfect mixture of relaxing and stimulating. I must have listened to his albums over and over again whilst writing my dissertation.

Bonobo

Bonobo

I’d describe his music as a mixture of hip hop, chillout and garage. I could listen to his work all day, he’s a versatile producer and his music really helps me relax.

Silkie.

Silkie is a Dubstep & Grime producer from London.

Silkie

Silkie

Like Joker, his sound is classed by some as Purple. However Silkie focuses a lot more on the sound of Jazz  in his work. Silkie’s music is really important to me becuase it opened up the genre of Jazz to me and I was able to discover so many great artists through his sound.

Blockhead.

Blockhead produces Hip Hop beats.

Blockhead

Blockhead

Quiet a few of them are jazz influenced and quiet sample heavy. His album ‘Music By Cavelight’ is my favourite of his.

With my release I want to blend together all the feelings that these artists make me feel when I hear their music. All the tracks will also signify the colour purple to me. It is a little strange but I think that music does have colours and shades to it. For example when I hear arabic music I think of gold colour and orange. when I hear regggae I think of yellows and greens. The music I’m making at the moment all seems blue, pink and purple to me at the moment. Regardless of genre.

I’m aiming for the release to contain around 5 or 6 tracks. I will release it digitally on Bandcamp, most likely as a free, name your price download. My good friend and photographer George will take photos for the release cover.

I’ve finally got a solid idea of what I want to do. With my time at universtiy ending I think it’s time to leave with something that really expresses my sound.

Damn Son, Where’d You Find This… Working with Dawson (Final Major)

Dawson had mentioned to me that he wanted me to make some sounds for the ident he’s made as part of a Vice competition. Not only am I really flattered when people ask me to do music for them but It also stretches my understanding of producing music to a brief. I prefer making music that I’m 100% in controll of. (I’m sure any producer does) How ever I think it’s valuable for me to test my self in different ways and try to intereperate musically, what someone is describing too me through speech.

This is Sam Dawson, He makes chalk boards

This is Sam Dawson, He makes chalk boards

I knew that the theme of Dawson’s ident revolved around the darker side to life in the U.K. Personally, I think this theme is reflected through some of my first productions on the Ipad, which were nearly all ambient pieces that I thought were the sounds of underpasses.

Sam is placing my sounds onto the timeline for his ident.

Sam is placing my sounds onto the timeline for his ident.

To begin with I loaded some bass sounds into Maschine and ran them through a low pass filter to make them deeper. As well as this I added some low-fi and distortion effects to them which gives can give a sound an 8 bit feel to it. I was cautious not to use these effects to much. I added just a little bit of each effect and this gave the bass frequency a industrial style hum. At this point I was left with a flat continous drone of low frequency sound. To bring this to life I applied another low pass filter and automated it sweeping from it’s 100% value to around 25%. This gives it the effect of the sound drawing out of thing air, peaking and sweeping back down into silence. This is a technique I use a lot in my dubstep and grime productions as it can lead to the familiar sounding wobble bass effects.

Another way I achieved this sound on this project was a little more experimental. I changed the beat grid in Maschine from 1/16th of a bar to 1/64th. This allows you to get loads more sounds bunched together in the same ammount of time. Below Is a screen shot I’ve annotated.

bass automation diagram

I used this technique on a kick drum. When you play it back, you are given a horrific sounding buzzing noise. Where the kicks are placed together so closely. To stop this I applied another low pass filter and them automated it sweeping up like before to make a wobbling drone noise. I’ve found this technique can be applied to other instruments (Percussion especially) to create some interesting sounds.

Below is the exported track, minus some sound effects used in post production.

The thing I found most challenging about this piece was trying to fit some sort of narrative to the track whilst keeping it incredibly short. To counter this I exported stems of various sounds and sent them to Sam to drop into the video at precise moments in the soundtrack.

I found the whole process valuable and enjoyable. It was the first time I’d worked to a brief whilst someone else was in the room saying what they liked and what they didn’t. I think this is a beneficial way of working collaborating with someone, befor I have sent exported tracks and then waited for feedback through, email or message. This takes too much time for me and it is not as easy for the person to explain what changes they want me to make. The face to face interaction helped me to understand what Sam wanted.